We are often asked for brief instructions on how to glue on the latex parts. We will be working on a complete tutorial for this. Until then, here are a few important tips to get you started.
Preparation
Good preparation is the be-all and end-all.
The parts should of course fit well into the design concept and the size of the latex part should also fit the part of the body where it is needed.
 Small holes caused by bubbles can still be ignored at this point. They are later closed with latex. The parts are blanks. The design will follow in the next steps.
The skin should be insensitive to latex and adhesive, as the procedure can otherwise trigger latex allergies, for example.
So clean and dry the skin and parts well.
Material: Senjo Color latex part, mastic, mastic remover, cotton swab and/or spatula
Gluing on the latex parts
Now we can coat the latex part and skin area with mastic glue and allow it to flash off a little. If the mastic is too dry, it will no longer stick. If it is too wet, it will not stick. So wait for the right time and then press the part firmly onto the skin.
Now the edges can be glued and step 1 is already done.
Smoothing the edges
Material: Senjo Color Latex Edge Filler and/or latex milk, spatula, Senjo fixing powder, powder brush

Use a spatula to apply the desired amount of Latex Edge Filler and smooth it out. The Edge Filler is a white paste and dries transparent. It should be applied quickly before it hardens. We have a few minutes to do this. Depending on the temperatures.
The result should be a smooth surface.
Now brush the transparent, slightly sticky surface with plenty of fixing powder and then remove the excess.
Painting the glued latex parts
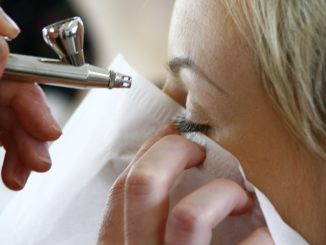
All standard make-up can be used to paint latex parts and skin. Grease make-up, alcohol-based paints and water-based make-up. With a brush or airbrush. Just as you like.

Nothing should stand in the way of the photo shoot now.
Removing the latex parts after the job
After the job, it is important for your protagonist to carefully remove the latex parts from the skin. What you need above all is a little time. Don’t just rip the parts off your body. Don’t flood it with removers either. You have the responsibility. So be nice to your model. Then she/he will certainly trust you again next time.
So first remove the make-up. Depending on the product used, e.g. with soap and water. The next step is to look at the edges. you can use a cotton bud to work glue remover and/or mastic remover under the edges and dissolve the mastic. Bit by bit you conquer the body/face of your model and then come to the final cleaning.
After the parts have been removed, you will certainly still see some edges. They are a mixture of latex, glue and paint and are now dissolved with the glue remover and removed with paper towels.
The rest is removed with warm water and shampoo or soap.
Then apply a good cream to the skin and massage as a thank you. She had a tough job and is now very grateful for it.
Senjo Color Material list for gluing latex parts
Here is an overview of suitable products:
Various latex parts
Mastic set (Art. 1003088) with adhesive and remover
Fixing powder (Art. TSP010)
Edge Filler (Art. T02512)
Latex Liquid (Art. T02533)
Adhesive remover (Art. T1186)
Here you can get everything you need for your project: Senjo Color material for make-up artists
And now have fun with your SFX latex mask project!


Be the first to comment